Learn how to deploy a Kubernetes cluster on-premises with the Kublr Platform using the SSH protocol.
You will need to run Kublr Control Plane. For instruction on how to do this, go to On-Premises Installation.
To install Kubernetes via ssh, your setting should be:
Go to the Credentials tab and create ssh private key

On the left menu, click Clusters.
Click Add Cluster.
 The Select Installation Type dialog is displayed.
In the Select Installation Type dialog, click Cluster.
Click Continue Setup.
 The ADD CLUSTER dialog is displayed.
In the ADD CLUSTER dialog, set Provider to “Bring Your Own Infrastructure”.
Specify Cluster Name.
Select Kublr Agent.
Specify Kubernetes Version.

If necessary, expand the Advanced Options and set them.
Click the INSTANCES step.
Use the Master Configuration section.
Specify the parameters of the master node(s) of your cluster as described below.
From the Masters list, select the number of master or management nodes.
If more than one master is selected, set the Load Balancer Address.
Set Installation Type to Automated using SSH.
Type in User Name.
Select SSH Key Name.
For each master, type in IP/DNS of Matster X.

Scroll to the Instance Group section (default name group1).
Specify the parameters of the worker node(s) in your group as described below.
Set Installation Type to Automated using SSH.
Type in User Name.
Select SSH Key Name.

To add a working node, in the Node Addresses, click the  button and enter the IP or DNS addresses, and then confirm the entered addresses by pressing the
  button.
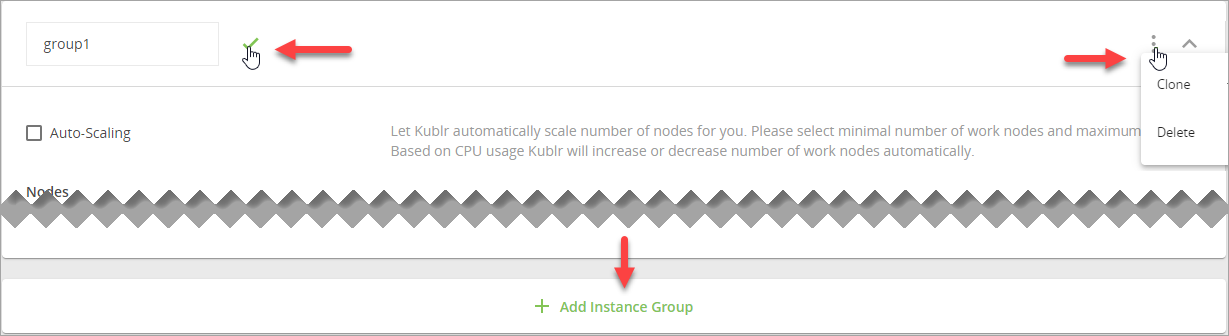
If necessary, set your own name for the instance group.
Note You can also clone or delete the current instance group, or add another one.
Click the REVIEW & CREATE step.
Review your cluster parameters.
At the bottom of the dialog, click CONFIRM AND INSTALL.
A notification is displayed “Your cluster is being created. It might take a few minutes.”
In the notification window, click OK.
Your new cluster page is displayed on the Events tab showing the cluster creation progress.
