To use Kublr, you’ll need to download and install Kublr Demo/Installer at https://kublr.com/deploy//
System Requirements for the cluster nodes
x86 64-bit hardware
Supported OS on nodes:
Root access to each node
Nodes are connected in your network and Kublr Demo/Installer configured IP is accessible from these nodes (ping)
From your nodes, firewall rules should allow traffic to Kublr Demo/Installer on ports 9080 / 9443
100Mbs stable internet connection
Kublr Demo/Installer should be correctly configured to be accessible in your local network. It is critical that you provide the correct IP address during the virtual machine startup. If you skipped this step, please re-run provisioning and configure your firewall rules to allow traffic to your computer.
For details on how to re-run Kublr Demo/Installer, see “KUBLR_HOST” information at the Kublr Quick Start.
Creating a cluster in your machine’s network is simple. Use your machine’s IP address for this network. If you don’t know how to get the IP address, contact your system administrator or read your OS manual.
To install Kublr clusters in a different network on complex network topologies, provide the IP address of your machine from that network.
Powered by Kublr, Vanilla Kubernetes Cluster does not include any advanced Kublr features, suitable for running workloads.
See some cluster parameters description here.
To add a new on-premises cluster:
On the left menu, click Clusters.
Click Add Cluster.
 The Select Installation Type dialog is displayed.
In the Select Installation Type dialog, click Cluster.
Click Continue Setup.
 The ADD CLUSTER dialog is displayed.
In the ADD CLUSTER dialog, set Provider to “Bring Your Own Infrastructure”.
Specify Cluster Name.
Select Kublr Agent.
Specify Kubernetes Version.

If necessary, expand the Advanced Options and set them.
Click the INSTANCES step.
Use the Master Configuration section.
Specify the parameters of the master node(s) of your cluster as described below.
From the Masters list, select the number of master or management nodes.
If more than one master is selected, set the Load Balancer Address.
Select Installation Type:

If necessary, expand the Advanced Options and set them.
Scroll to the Instance Group section (default name group1).
Specify the parameters of the worker node(s) in your group as described below.
Select Installation Type:
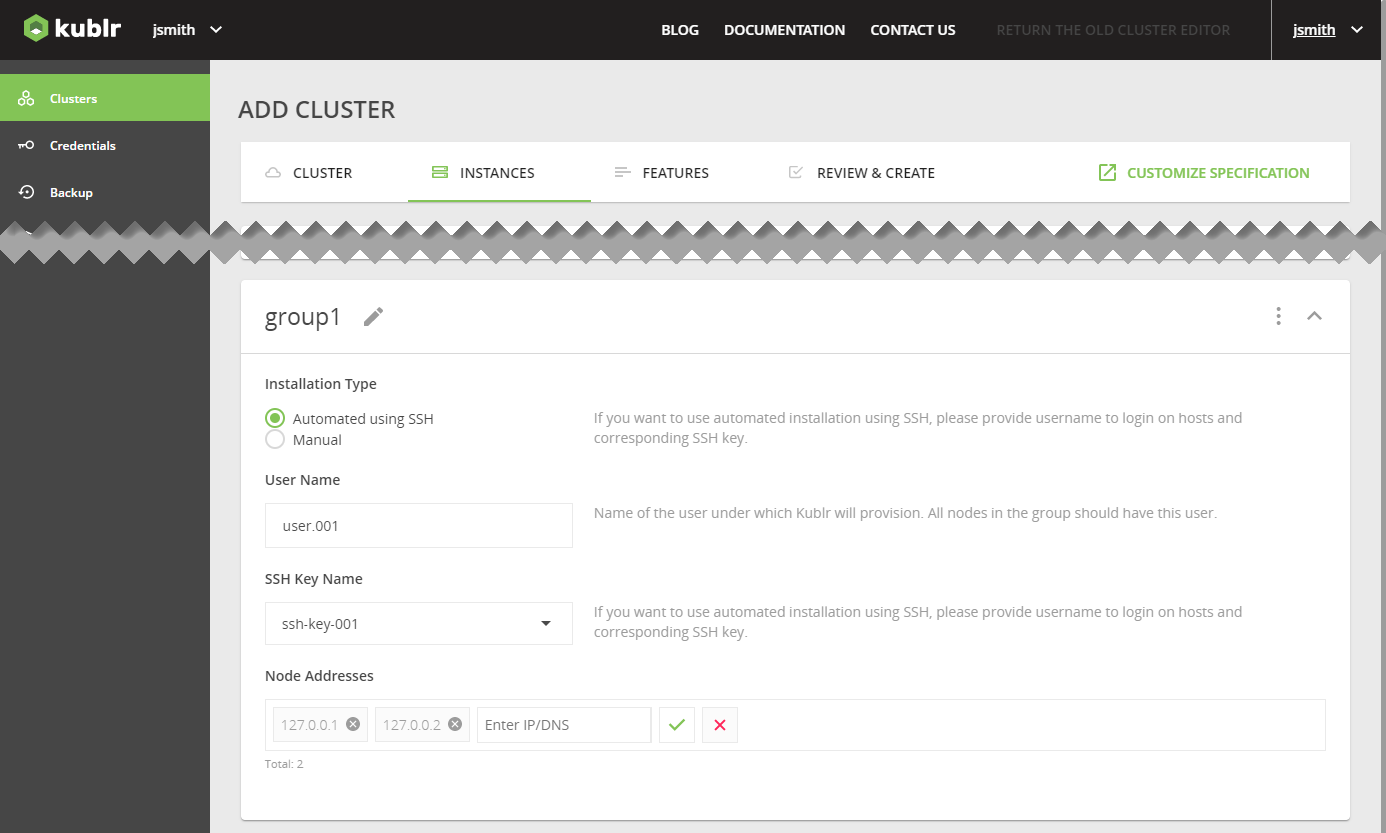
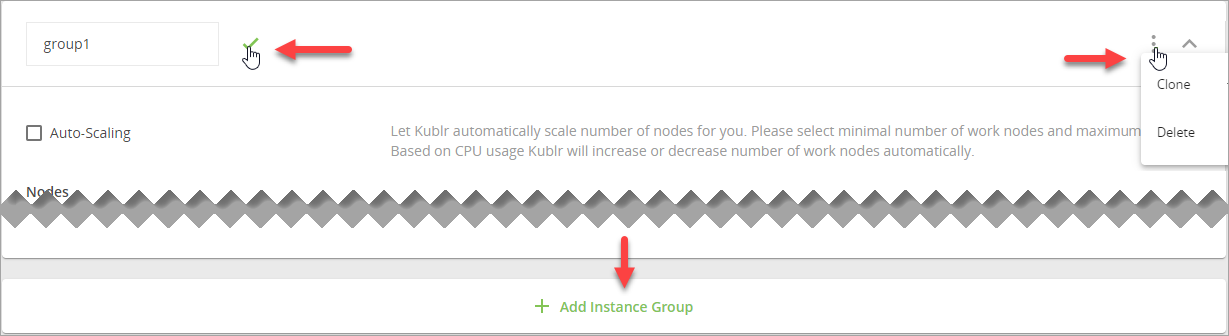
If necessary, set your own name for the instance group.
Note You can also clone or delete the current instance group, or add another one.
Optionally, click the FEATURES step.
If necessary, add features to your cluster, specifying parameters under:

If necessary, expand the Advanced Options and set them.
Click the REVIEW & CREATE step.
Review your cluster parameters.
At the bottom of the dialog, click CONFIRM AND INSTALL.
A notification is displayed “Your cluster is being created. It might take a few minutes.”
In the notification window, click OK.
Your new cluster page is displayed on the Events tab showing the cluster creation progress.
Open Terminal and login to the master node machine with ssh:
ssh <user_name>@192.168.31.201
After you login to the machine you may need to change current user to root:
sudo -i
Insert the instruction copied earlier in command line:
curl 'http://192.168.99.106:9080/api/install/5a7a04dc7556e10001193f82/download?nodeGroup=master&nodeOrdinal=0' -o ./kublr-install.sh; chmod a+x ./kublr-install.sh; ./kublr-install.sh
You will see the following message for login

Enter the username and password of the user you are logged into Kublr Demo/Installer

At the end you will see


Open Terminal and login to the worker node ssh:
ssh <user_name>@192.168.31.204
After you login to the machine you may need to change current user to root:
sudo -i
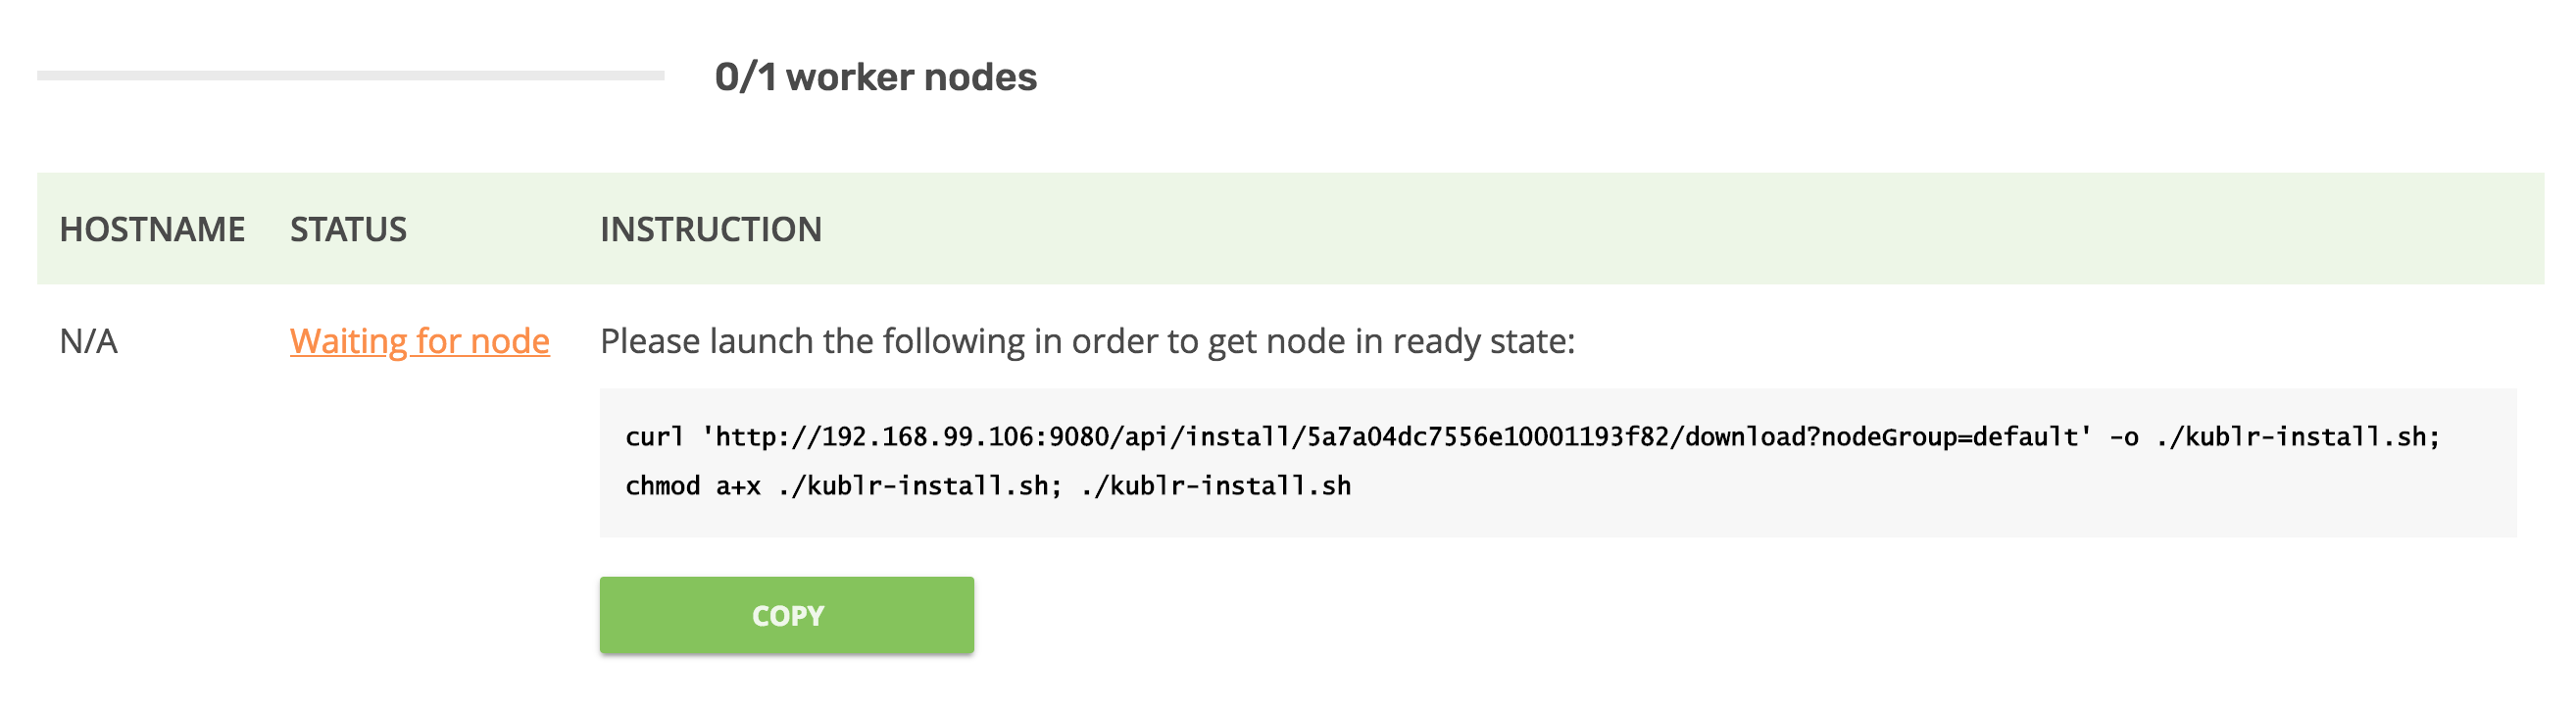
Insert the instruction copied earlier in command line:
curl 'http://192.168.99.106:9080/api/install/5a7a04dc7556e10001193f82/download?nodeGroup=default' -o ./kublr-install.sh; chmod a+x ./kublr-install.sh; ./kublr-install.sh
Enter the username and password of the user. You will be logged into Kublr and should wait until the installation is complete

Go into the Kublr UI and wait until cluster is switched to running status:

For detailed instuctions, see the Install and Set Up kubectl article in Kubernetes documentation.
curl -LO https://storage.googleapis.com/kubernetes-release/release/$(curl -s https://storage.googleapis.com/kubernetes-release/release/stable.txt)/bin/darwin/amd64/kubectl
chmod +x ./kubectl
sudo mv ./kubectl /usr/local/bin/kubectl
To retrieve config from Kublr */:
mkdir ~/.kube
cp ~/Downloads/config.yaml ~/.kube/config
kubectl cluster-info
Install Helm. Click here for detailed guidelines.
For Mac users:
curl https://raw.githubusercontent.com/kubernetes/helm/master/scripts/get > get_helm.sh
chmod +x get_helm.sh
./get_helm.sh --version v3.15.4
For Windows users:
By default both WordPress and MariaDB require support for Persistent Volume storage provisioner. Configuration of that goes beyond the scope of the Quickstart, so install Wordpress with persistence disabled. Also, for on-premises installation, use Service with Type = NodePort.
Note: Additional configuration parameters for WordPress and MariaDB are available. See wordpress and mariadb documentation respectively.
helm install bitnami/wordpress --generate-name --set persistence.enabled=false,serviceType=NodePort,mariadb.persistence.enabled=false
export SERVICE_PORT=$(kubectl get svc --namespace default wordpress-wordpress -o jsonpath='{.spec.ports[?(@.name=="http")].nodePort}')
export SERVICE_IP=$(kubectl get nodes -o jsonpath='{.items[0].status.addresses[?(@.type=="InternalIP")].address}')
echo http://$SERVICE_IP:$SERVICE_PORT/admin
echo Username: user
echo Password: $(kubectl get secret --namespace default wordpress-wordpress -o jsonpath='{.data.wordpress-password}' | base64 --decode)
Open the browser and navigate to the URL from console output.
Congratulations! You have just deployed your first app in a Kubernetes cluster with Kublr.
