The Kublr Demo/Installer must be installed. If you haven’t done that yet, please refer to the Installation Guide for the Kublr Demo/Installer.
System requirements for the cluster nodes
Steps below describe how to use Kublr to create VMware vSphere Kubernetes cluster. The following steps are described:
Consider the following when preparing a VM template:
More details are available in vCloud Director documentation
To add a new cluster:
On the left menu, click Clusters.
Click Add Cluster.
 The Select Installation Type dialog is displayed.
In the Select Installation Type dialog, select Platform or Cluster.
Click Continue Setup.
 The add cluster/platform dialog is displayed.
Set Provider to “VMware vCloud Director”.
Specify Cluster Name.
From the Credentials list, select previously created VMware vCloud Director credentials.
As credentials are selected, the Virtual Data Center parameter is populated automatically.
Select Kublr Agent.
Specify Kubernetes Version.
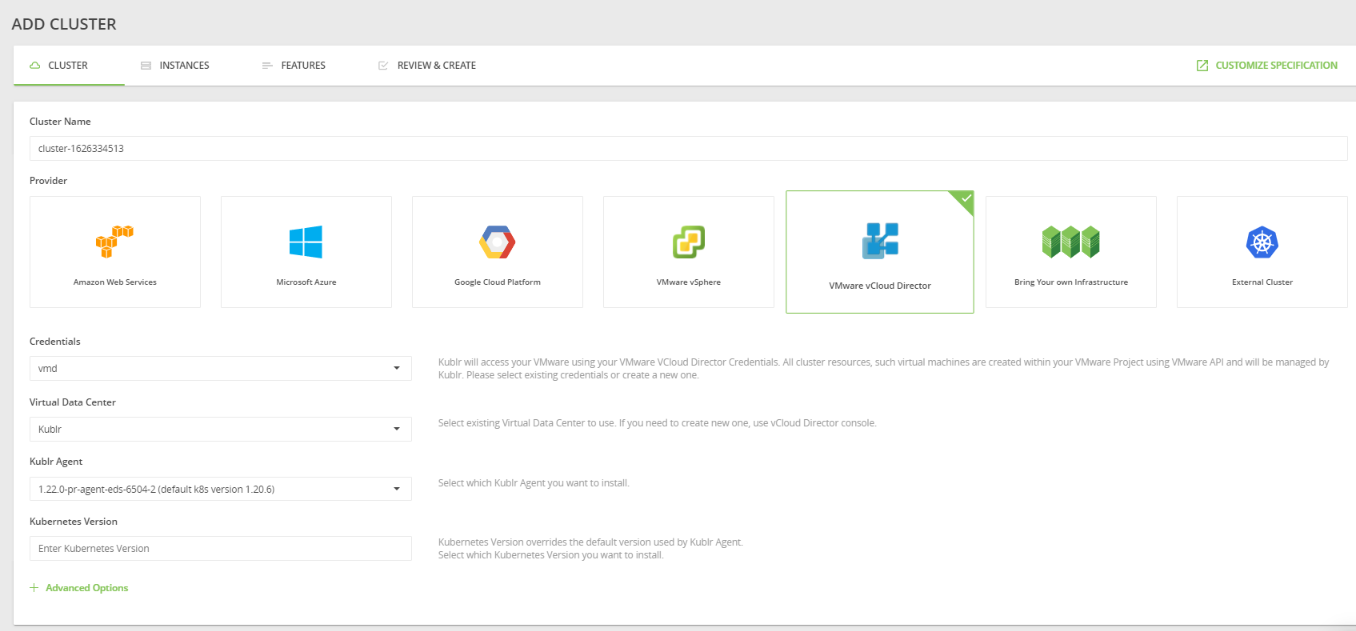
Optionally, set Advanced Options.
Scroll to the Network Configuration section.
Check automatically filled (on credentials selection) parameters:
In Load Balancer IP, type in the main Kublr cluster private IP address (must be from the network CIDR block).
If necessary, to create a new organization network, in the Organization Network field, type in the new name, then specify the corresponding parameters for the network.
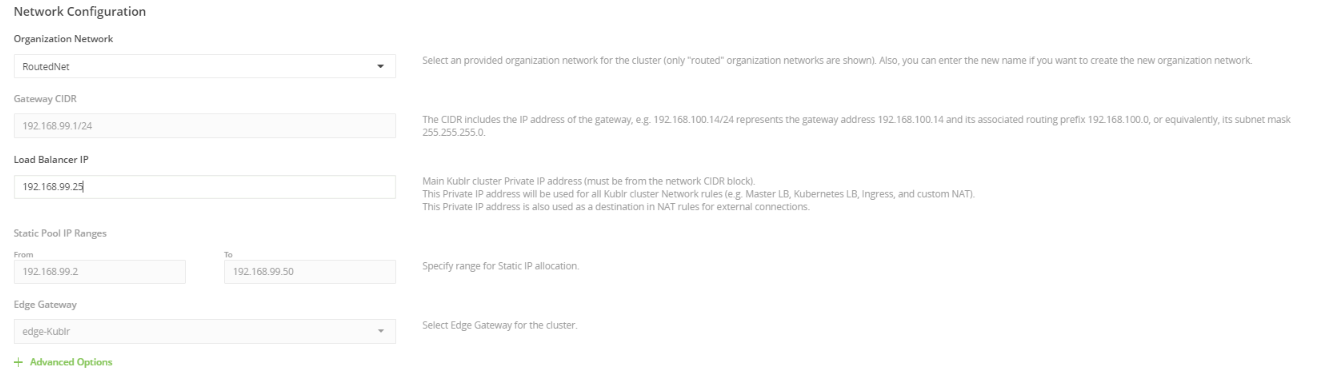
See detailed parameters description here.
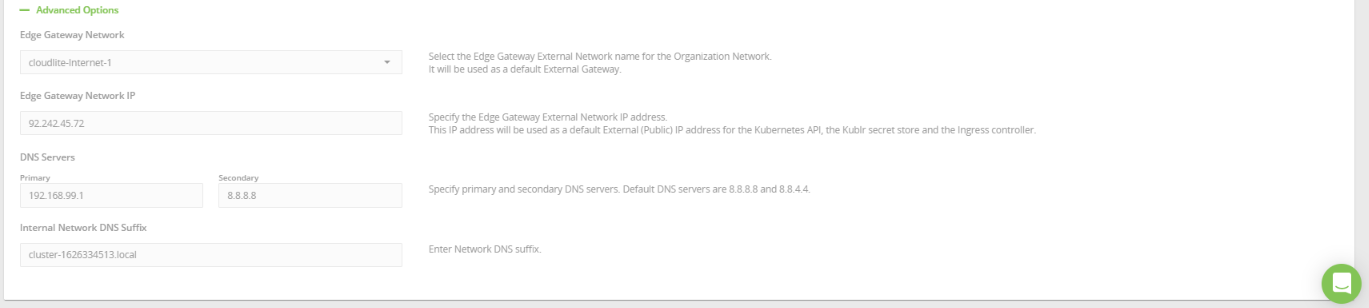
Optionally, set network configuration Advanced Options.
Use the INSTANCES tab.
Use the Master Configuration section.
Specify the parameters of the master node(s) of your cluster as described below.
From the Masters list, select the number of master nodes.
Set Master X: IP for each node.
For 3 and 5 master nodes configuration, optionally specify Load Balancer Address.
Select VM Template from the list (If you don’t have template, please create one as specified here.)
Set:

Optionally, set Advanced Options.
Scroll to the instance group section (default name group1).
Specify the parameters of the worker node(s) in your group as described below.
Select IP Address Allocation Mode.
Enter number of Nodes to be provisioned in the node group.
Select VM Template from the list (If you don’t have template, please create one as specified here.)
Set:
If necessary, set your own name for the instance group.
Note For your working nodes, you can have as many instance groups as you need (clone or delete the current instance group, or add another one). If necessary, give specific name to each group.
Optionally, set Advanced Options.
Use the FEATURES tab to select and configure FEATURES that you want to include into your cluster.

Click the REVIEW & CREATE step.
Review your cluster parameters.
At the bottom of the dialog, click CONFIRM AND INSTALL.
A notification is displayed “Your cluster is being created. It might take a few minutes.”
In the notification window, click OK.
Your new cluster page is displayed on the Events tab showing the cluster creation progress.
When using images delivered by provider, in some cases you may face the problem of not working guest OS customization script until VM reboot. This is caused by template with open-vm-tools version in Ubuntu 18.04.x Server or Desktop and broken installation of the dbus service.
For details on open-vm-tools problem, see the How to make guest customization work on Ubuntu 18.04.x Server and Desktop troubleshooting article in VMware knowledge base.
For details on dbus service problem, see this Ubuntu question-answer thread: I can’t use the shutdown command because the system “Failes to Connect to bus: No such file or directory”
In brief, reinstall dbus with: apt-get install --reinstall dbus.
